
ndSync lets you sync NetDocuments workspaces and folders to your Mac for offline access. This guide walks through downloading, installing, and configuring ndSync on macOS.
This article is part of our Ultimate Guide to ndSync series.

Before you begin: Your firm’s NetDocuments administrator must enable ndSync before you can use it. If you get an error during setup, check with your admin to confirm ndSync policies are configured.
Step 1: Download ndSync
https://apps.netdocuments.com/apps/ndSync/ndSync.pkg
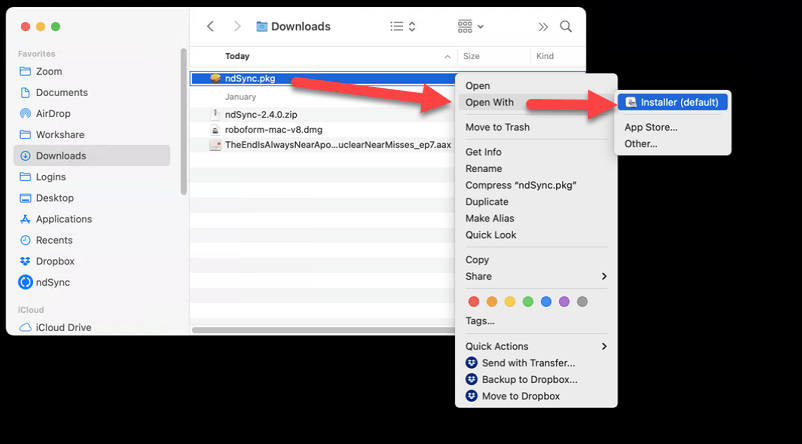
Step 2: Go to Finder and Click on the Downloads Folder
Step 3: Right-click on the file that downloads, click Open With, and then Installer
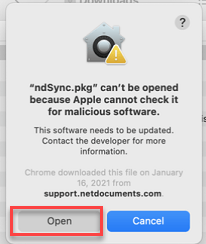
Step 4: Click Open
Step 5: Click Continue

Step 6: Click Continue

Step 7: Click Install

Step 8: Set up ndSync to Launch at Startup
System Preferences –> Users & Groups -> Login Items
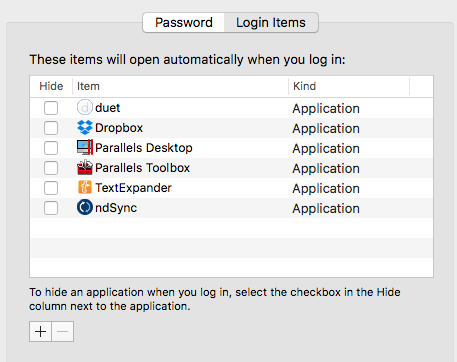
If ndSync is not on this list, click on the plus sign, browse to Applications, and add it.
Configure Sync Settings
After installation, click the ndSync icon in your menu bar and select Settings to choose which workspaces and folders to sync.
Note: By default, only recent or favorite workspaces appear in the sync selection for Client/Matter cabinets. Open or favorite the workspaces you want to sync before configuring ndSync.
Troubleshooting
“App can’t be opened” error: Go to System Preferences → Security & Privacy → General and click “Open Anyway” for ndSync.
ndSync won’t connect: Confirm your firm has enabled ndSync policies.
Workspace doesn’t appear in sync list: Open the workspace in NetDocuments or add it to your favorites, then refresh the sync selection.