
If your firm uses Microsoft Teams for day-to-day communication, ChatLink is the integration that brings NetDocuments directly into that workflow. Instead of switching between Teams and a browser to find or share documents, ChatLink lets you access your NetDocuments workspaces, share document cards in conversations, and even save Teams posts as PDFs — all without leaving Teams.
This post walks through how to set up the two main components of ChatLink: the NetDocuments workspace tab and the messaging extension.
Before You Begin
ChatLink is a paid NetDocuments add-on, not included in the base subscription. If you’re not sure whether your firm has purchased it, check your NetDocuments subscription details or contact your NetDocuments account representative.
You’ll also want to confirm which region your NetDocuments repository is in — US (Vault), Canada, EU, AU, DE, or GOV — so you can select the correct regional app during setup.
Part 1: Adding the NetDocuments Workspace Tab to a Teams Channel
The workspace tab embeds a specific NetDocuments workspace directly inside a Teams channel. This is most useful when you have a Teams channel dedicated to a particular matter or project — the one-to-one relationship between a channel and a workspace keeps everything organized.
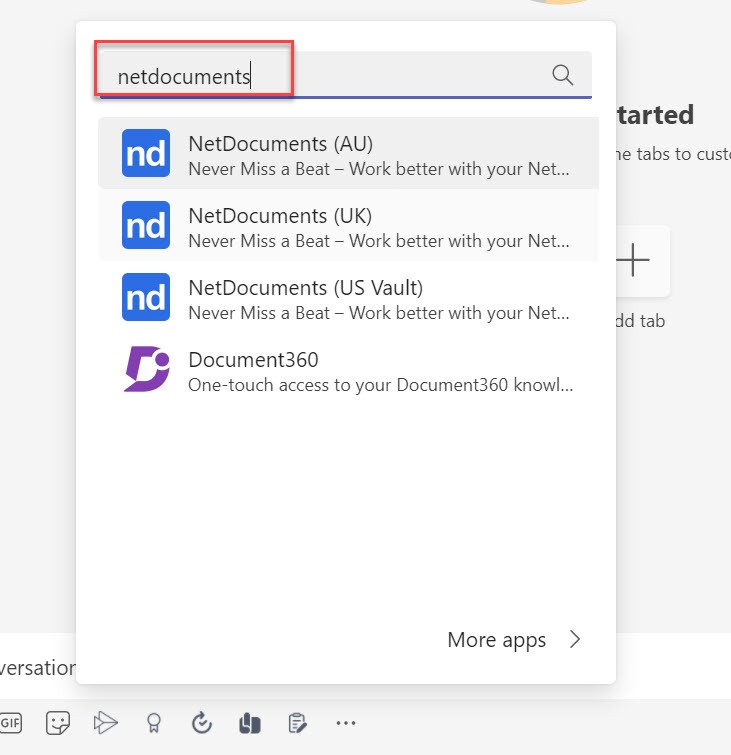
In your Teams channel, click the + icon at the top to add a new tab.

Search for NetDocuments in the app search field. Select the app for your region — for example, NetDocuments (US Vault) or NetDocuments (CAN).

Click Add, then click Add again on the confirmation screen.
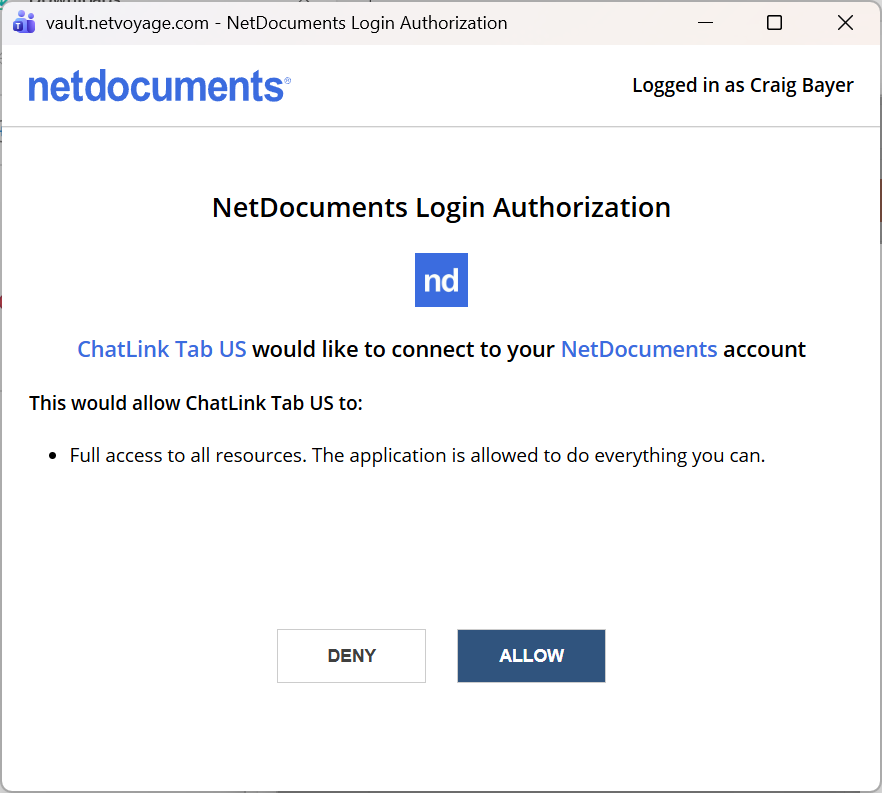
Sign in to NetDocuments when prompted. If your firm uses Single Sign-On through Microsoft 365, look for the SSO or “use my organization’s login” option rather than entering a username and password directly.
Click Allow to grant Teams permission to access your NetDocuments account.
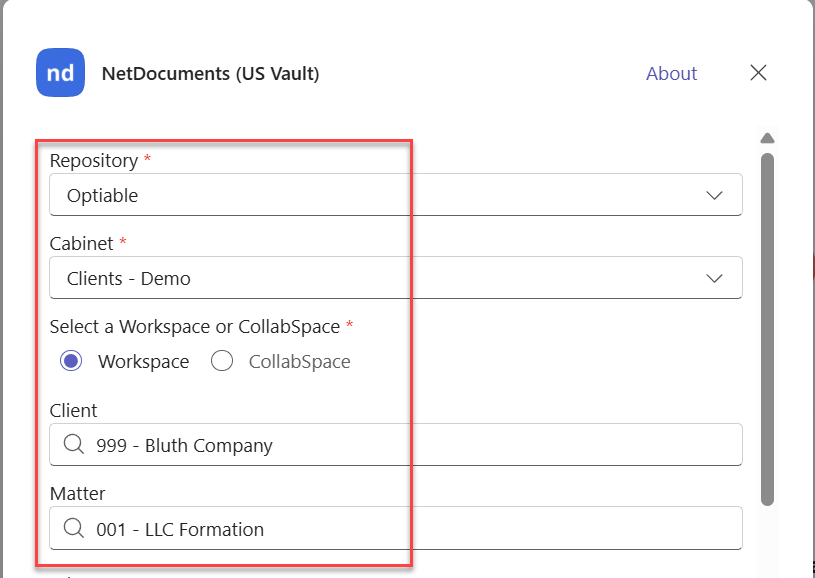
Choose your repository, cabinet, and workspace. The workspace you select will appear in this tab. You can optionally rename the tab to something more descriptive, like the matter name.
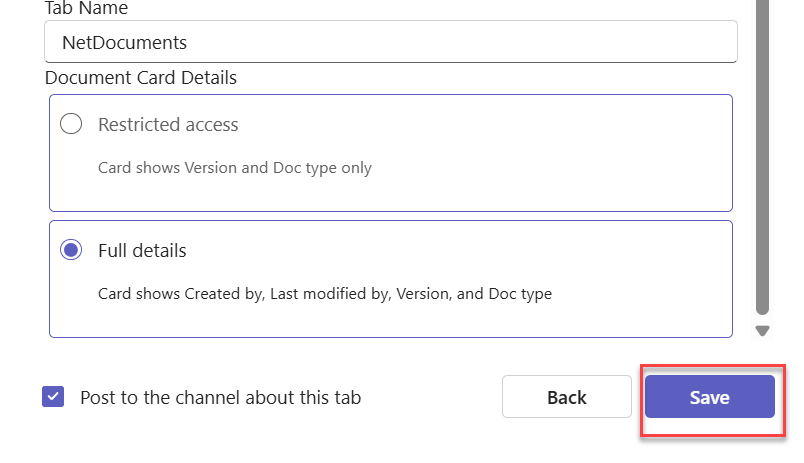
Click Save. The tab will appear at the top of the channel and display the workspace contents immediately.
You can repeat this process in other channels, linking each one to a different workspace.
What You Can Do From the Tab
Once the tab is live, you have access to the full workspace — documents, folders, filters, and saved searches — without leaving Teams. From here you can open documents locally or in Microsoft Office Online, share items to the channel or via email, preview documents using NetDocuments SmartView, upload files, and create new folders. The search bar at the top of the tab lets you run quick name searches within the workspace.
Part 2: Adding the NetDocuments Messaging Extension
The messaging extension is separate from the workspace tab. It lives in the compose area of any Teams chat or channel and lets you search for a NetDocuments document and share it as a document card mid-conversation — without navigating away from the message thread.
In any Teams chat or channel, click the + icon in the message compose area (next to the send button).
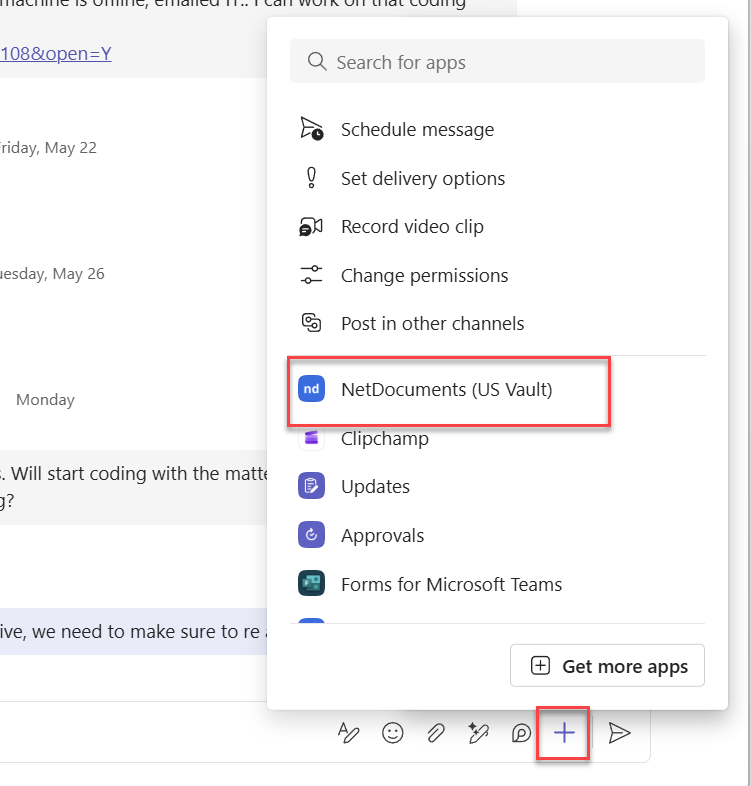
Search for NetDocuments and select the app for your region. Click Add, then Add again, and sign in if prompted.
Once installed, the extension is accessible any time you click that same + icon — NetDocuments will appear in your list of installed extensions.
Scoping Your Search to a Specific Workspace
By default, the messaging extension searches across your entire repository. For most matter-based work, you’ll want to narrow that to a specific workspace. Click the ellipsis (…) in the top right corner of the extension, select Settings, and choose your repository, cabinet, and then the specific workspace or CollabSpace. You can toggle between a workspace-scoped search and an everything search at any time.
The Settings menu also controls what information appears on shared document cards — Restricted shows just the document name, version, and type, while Full Details adds the creator and last modifier.
A Note on Security
Document cards are safe to share freely in Teams. If someone receives a card for a document they don’t have access to in NetDocuments, they won’t be able to view any part of it — not the content, not a preview, not even profile details. NetDocuments governs access, not Teams.
Need Help Setting Up ChatLink?
If you’d like assistance getting ChatLink configured for your firm, we’re happy to help. Schedule a consultation or reach out through our contact page.