
Linking Clio and NetDocuments offers law firms a promising way to unify their practice management and document workflows. The integration aims to simplify how firms manage client matters, documents, and communications by connecting Clio’s scheduling and billing tools with NetDocuments’ secure storage and collaboration features. However, despite its appeal, the connection between these platforms has notable shortcomings. One of the most significant issues is that Clio does not push the correct client and matter IDs into NetDocuments. This misalignment can lead to confusion, misfiled documents, and extra manual work for legal teams trying to maintain accurate records. In this post, we’ll explore this and other weaknesses that firms should be aware of before relying heavily on the integration.
Like the NetDocuments Cosmolex Integration, I don’t recommend you turn on the Native NetDocuments Clio integration.
Why doesn’t the link work?
Here is a Matter in Clio:

The Client Details in Clio are:

In NetDocuments, I would expect to see the following:

This matches exactly what I have in Clio. Instead, this is what I get:

The Client and Matter ID are not populated. Instead, Clio uses a random database number that no human knows. The Matter ID does go in the description, so at least that is there. The Type of Law is empty; Clio doesn’t send that over.
The other thing the link doesn’t do is automatically link existing clients and matters together. If you have 500 matters already in Clio, you would need someone to manually link each matter.
Therefore, I wouldn’t recommend turning on the native Clío link.
Feel free to ignore what I said here and go on to linking the programs together.
Other companies have built a Clio NetDocuments integrations to address these shortcomings:
- GDSI: https://gdsi.com/clio-integration-engine-for-netdocuments/
Part 1: Setting up the NetDocuments and Clio Integration
Step 1: Clio – Go to Settings -> Documents –> Document Sources
Step 2: Choose the Location of your NetDocuments Data Center
Step 3: Click Link NetDocuments Account

Choose your location and then click Link NetDocuments Account. If you are not logged into NetDocuments, you will need to log in.
Step 4: Choose which NetDocuments Cabinet you want to link to Clio and choose View by Workspaces

Step 5: Make NetDocuments the default Document Source and click Save Changes
Part 2: Using the NetDocuments and Clio Integration
Step 1: Go to a Matter in Clio
Step 2: Click on the Document Tab in the Matter
Step 3: Create or Link the Client
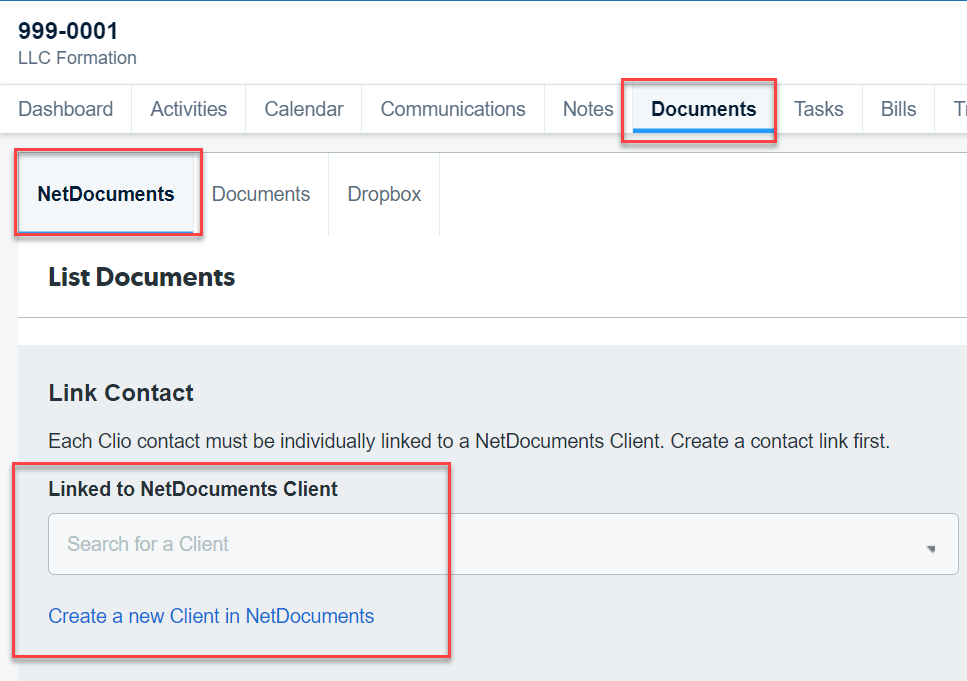
Step 4: Create or link the Matter

Now, on the Document section of each matter, you can link Clio to NetDocuments. If you are starting NetDocuments for the first time, you can export all your client and matter info from Clio and easily import it into NetDocuments.
Here is a link to an article we created about manually creating Clients and Matters in NetDocuments: https://optiable.com/3-1-adding-a-new-client/