

If your firm uses Single Sign-On, creating a user in NetDocuments isn’t enough on its own — the user must also be assigned to your NetDocuments application in Microsoft Entra ID. Until that assignment exists, their SSO login will fail. This guide walks through that assignment step by step.
These steps are usually handled by your IT company as part of onboarding a new user. For the full onboarding process, see The Definitive Guide to Adding a New User to NetDocuments.
Note on naming: Azure Active Directory is now called Microsoft Entra ID. The steps below are the same as before — only the name and some portal styling have changed. You can use either the Microsoft Entra admin center (entra.microsoft.com) or the Azure portal (portal.azure.com); both get you to the same place.
A heads-up on the screens: Microsoft changes the look of this portal often, so the exact wording, layout, and button placement will likely differ a little from the screenshots below. The path is what stays consistent — Entra ID → Enterprise Applications → your NetDocuments app → Users and groups → Add user/group. If a screen looks different, follow that path and you’ll be in the right place.
Before you start: You’ll need admin access to Microsoft Entra ID with rights to manage enterprise application assignments. The user should already exist in Microsoft 365 / Entra ID, and you should have already created their NetDocuments user.
Step 1: Sign in to the portal
Go to the Microsoft Entra admin center at entra.microsoft.com (or the Azure portal at portal.azure.com).
Step 2: Click on Microsoft Entra ID

Step 3: Click on Enterprise Applications
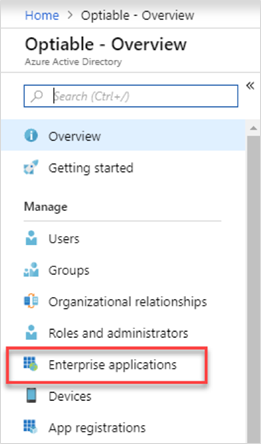
Step 4: Find and select your NetDocuments app from the list.
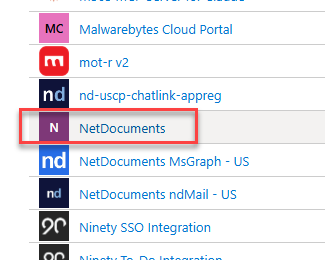
Be careful here: your firm likely has several NetDocuments-related apps in Entra, with names like NetDocuments MsGraph, NetDocuments ndMail, and something with chatlink in the name. You don’t want any of those. The one you’re looking for is the app named simply NetDocuments (the core Enterprise app) — that’s the one tied to signing in. Assigning the user to a MsGraph, ndMail, or ChatLink app won’t let them log in.
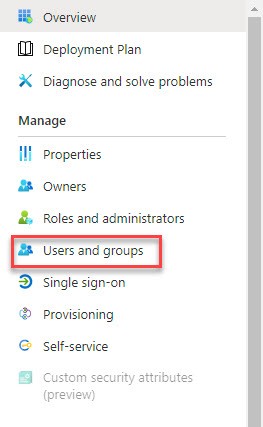
Step 5: Go to Users and Groups
Step 6: Click Add user/group
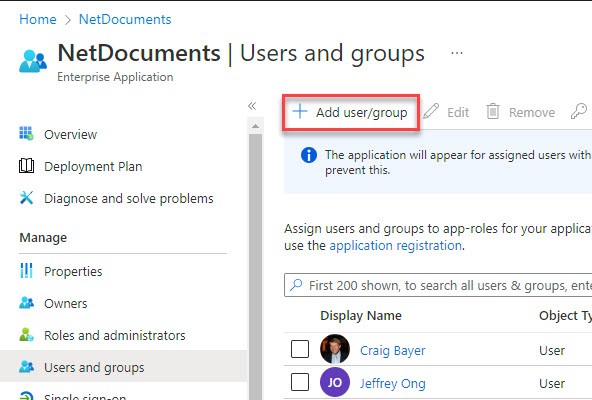
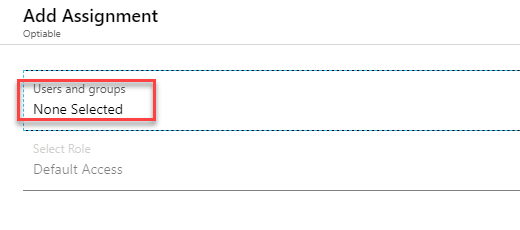
Step 7: Click on User and Groups and then None Selected
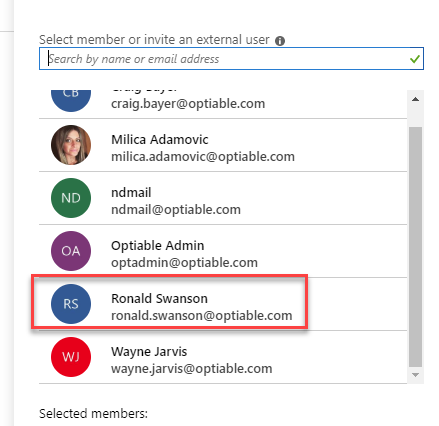
Step 8: Double-click on the User you just added, and then select
(You might have to search for them and then double-click)
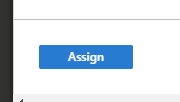
Step 9: Click Select and then assign
That’s it — the user is now assigned to the NetDocuments app and can sign in through Single Sign-On.
One Thing to Tell the User
Once they’re assigned, make sure the new user knows to click “Use Single Sign-on” on the NetDocuments login screen — not to type a username and password into the login fields. Entering credentials directly won’t work with SSO, and it’s a frequent reason new-user logins fail. Walk them through it here: How to Log In When Using Single Sign-On in NetDocuments.
Assigning the user in Microsoft Entra ID is the piece that makes SSO work — skip it, and the account exists in NetDocuments, but the user can’t get in. Pair this with the in-app user creation steps and the full onboarding guide for the complete picture.
If your firm needs help configuring NetDocuments Single Sign-On, cleaning up user access, or planning an implementation, schedule a consultation or get in touch with our team.