When we set up NetDocuments for customers, we make it so only a select group can permanently delete items.
NetDocuments refers to this as purging documents.
The problem with doing this is that deleted items tend to stay in NetDocuments forever, which can count against your storage costs. To get around this, I like to create a saved search that allows me to delete anything older than 90 days.
Part 1: Making sure your NetDocuments is set correctly
Before you purge these items, go into the Cabinet Settings and make sure this setting is set to After 30 days. If you mess this up, you can restore the documents. I see no reason not to do this for each cabinet.
Part 2: Setting up the Saved Search
Step 1: Click on the … and ensure you are in your client* cabinet.
*You can only do this for one cabinet at a time, so I decided to concentrate on the Client Cabinet, where usually 90% plus of the documents reside.
Step 2: In Modified Date, type in –19999 and –90
You have to put in a starting date. -19999 is the largest number I could put in about 55 years ago. -90 is 90 days. So this is telling NetDocuments to find everything between 55 years and 90 days ago.
Anything deleted in the last 89 days would not show up.
Step 3: Click Show more options
Step 4: Choose Deleted Items
Step 5: Click Search
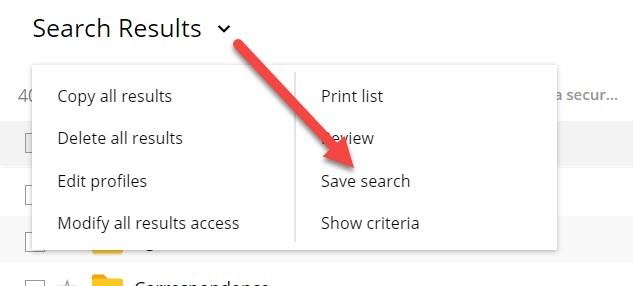
Step 6: Under Search Results, Choose Save Search

Step 7: Give it a Name like “Items eligible to be purged” and click OK
Step 8: Click the Star Next to the Search, which will put the Search on your Home Screen
Part 3: Purging the Items
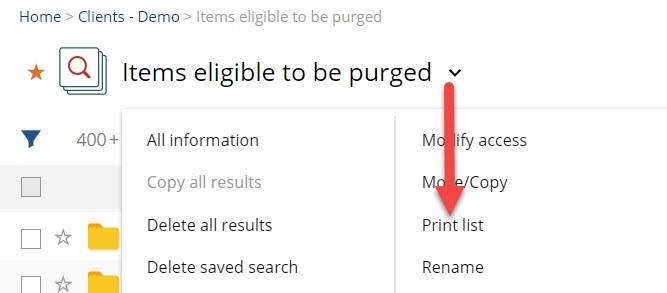
Step 1: Under Search Options, Click Print List

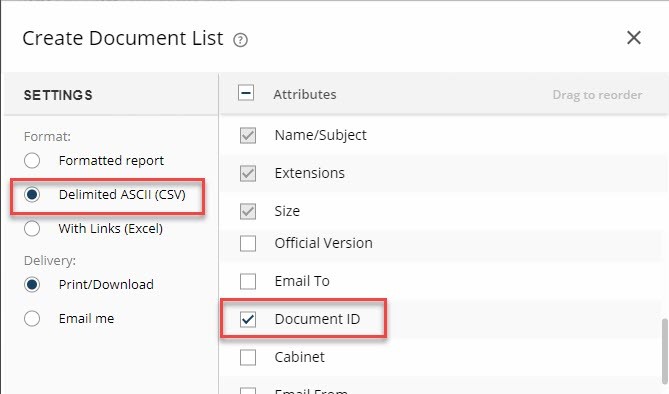
Step 2: Choose Delimited ASCII; make sure the Document ID is selected, and Choose OK

Step 3: Save the Downloaded File
If you mess this up, we have 30 days to restore the documents you are about to purge.
Step 4: Under Search Options, Click Delete all Results
Step 2: Type in Delete and Click OK


