

In Part 1 of the series, we talk about using ndoneclick the program that allows you to click on a document in your browser, have it download, make changes and seamlessly get uploaded again. In this part, we will talk about ndoneclick, the dropbox like a program for NetDocuments. Remember, Word for Mac supports no 3rd party plugins, so we can’t have NetDocuments pop open when we hit save like we do in Windows.
If I installed ndsync, I can synchronize locations from NetDocuments to my Mac. Now, when I hit save in Word,

I can browse to my NetDocuments Cabinet’s and save the documents. This helps bridge the gap until we get 3rd party plugins in Word.
Here is how you install ndoneclick for Mac:
Step 1: Go to the link below
https://apps.netdocuments.com/apps/ndSync/ndSyncMacSetup.zip

Step 2: Click Download

Step 3: Click on the file that downloads

Step 4: Click Continue

Step 5: Click Continue

Step 6: Click Install

Step 7: Click on the nd button and go to settings

Step 8: Click Select items to synchronize

Step 9: Choose items to Sync

Note: This is where it gets interesting. By default, NetDocuments will allow you to only choose your most recent or your favorite workspaces to sync. In your client Cabinet, you need to make sure that the files you want to appear have been recently opened or made favorites. On Folder Cabinets, you can choose any folder to sync.
Step 10: Setup ndSync to Launch at Startup
System Preferences –> Users & Groups -> Login Items
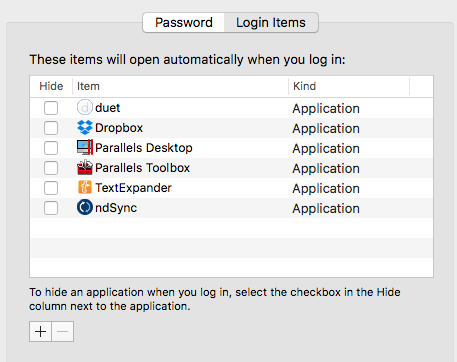
If ndSync is not on this list, click on the plus side, browse to Applications, and add it