It’s only natural to want to use the default ‘admin’ account on your Windows PC. For one thing, it’s automatic – and it also offers more user options.
On the (far more significant) downside, admin access offers complete, unlimited access to a computer’s critical systems and files.
As a law firm, it’s best practice to remove local admin rights from each machine. While many businesses end up blowing the budget on malware, doing away with admin rights eliminates 85% of Microsoft vulnerabilities.

https://www.beyondtrust.com/resources/whitepapers/microsoft-vulnerability-report
This method is the best way for law firms to prevent viruses. With a wealth of sensitive information on any given PC or laptop, taking such a straightforward measure is a must.
Let’s delve deeper into the topic, below:
The Nuts and Bolts of Eliminating Admin Rights
It’s fair to wonder how an action that’s seemingly so basic could protect a law firm’s computers from an endless array of malignant viruses.
Well, the answer isn’t too hard to grasp, even for the IT layman. When a user’s access rights are limited, they’re unable to perform more impactful operations throughout the overall system. Therefore, malicious malware can’t enter through the user’s computer.
While it seems like limiting access suggests a lack of trust in staff, it only comes down to protecting computer systems and reducing vulnerabilities. Without taking this measure, the computers at a law firm are at risk to rogue applications, destructive spyware, and a plethora of other unwanted infiltrators.
Status and positions are irrelevant when it comes to this security practice. Many companies’ IT departments don’t even allow presidents and CEOs to have admin rights.
Won’t this Make it Hard to Use the Computer?
Sure, there are limitations after removing admin rights, but it’s virtually unnoticeable in the grand scheme. Nothing’s going to get in the way of getting work done or using software that’s been installed. Nor will it disrupt creating/saving files, getting onto the internet, or any other computer-based task at the firm.
There will be times where a task requires an admin account, in which case, it’s only a matter of typing the admin password into the box that’s popped up.
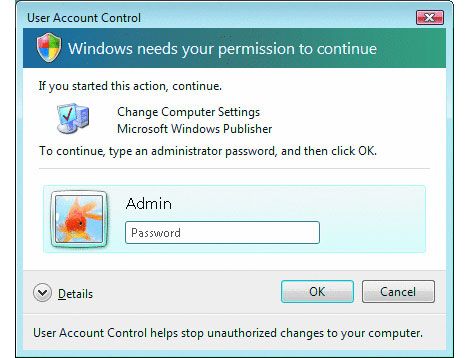
Though, when an admin password is needed, it’s generally a sign of a task that could leave the computer at risk. In this scenario, make sure to read up on the action before moving forward.
Non-admin users may need to type in a password to install or remove programs or to copy, change, and delete files in protected areas of the hard drive. Also, an admin password is required to alter vital operating system (OS) settings—which are mainly done throughout the initial setup process.
Law Firms Need to Protect Themselves by Removing Admin Rights
Computer viruses cost businesses $55 billion every year. Furthermore, companies spend $8 billion on security measures and malware annually. Considering that removing admin rights negates all but 15% of viruses, this can drastically bolster a law firm’s bottom line.
Plus, at law firms, there are more pressing matters to focus on than computer viruses. So, abide by this one effortless practice, make computer viruses a thing of the past, and concentrate on what’s truly important.
How to Remove Admin Rights from your Account
Mac users get a break here; we only need to do this in a Windows Environment.
Step 1: Control Panel –> Change Account Type

Step 2: Click Add a user account

Step 3: Click Sign in without a Microsoft account.

Step 4: Click Local Account

Step 5: Create a User Name and Password. (Choose something other than admin or administrator for the User Name.) and Click Next

Step 6: Open up your new Admin Account by clicking on the name

Step 7: Click Change the Account type

Step 8: Choose Administrator and then Change Account Type

Step 9: Open up your Account

Step 10: Click Change the account type

Step 11: Choose Standard and then Change Account Type