

Adding a new client or matter is a routine administrative task in NetDocuments, but doing it correctly keeps your workspaces organized and your documents easy to file and find. The process is quick once you know where the settings live.
This guide covers both workflows: adding a client first, then adding a matter under that client. Firm administrators handle these two tasks regularly, so it’s worth getting comfortable with them.
Before you start — two things to know:
- You must be a repository administrator. Adding clients and matters through Profile Attributes requires admin rights. If you don’t have admin access, reach out to whoever manages NetDocuments at your firm.
- You may not need to do this at all. If your firm uses legal practice management or accounting software, that system is usually linked to NetDocuments, and new clients and matters flow in automatically. In that case, you’ll add them in your practice management system and let them sync, rather than creating them here. Check with your administrator first to avoid creating duplicates.
Adding a New Client
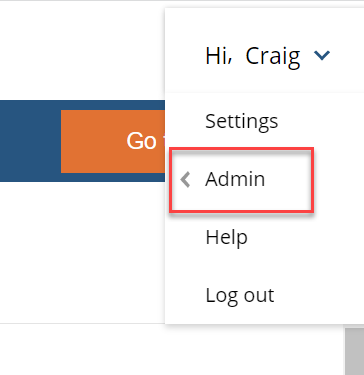
Step 1: Hi First Name –> Admin
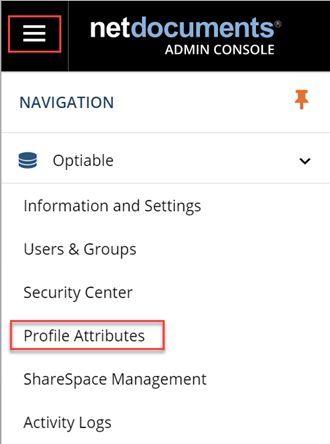
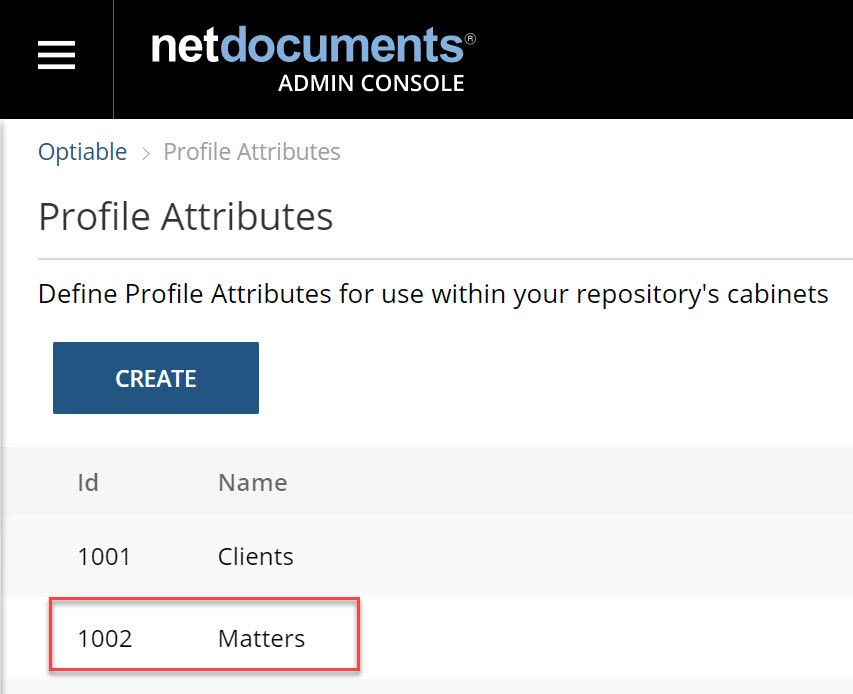
Step 2: Admin –> Profile Attributes
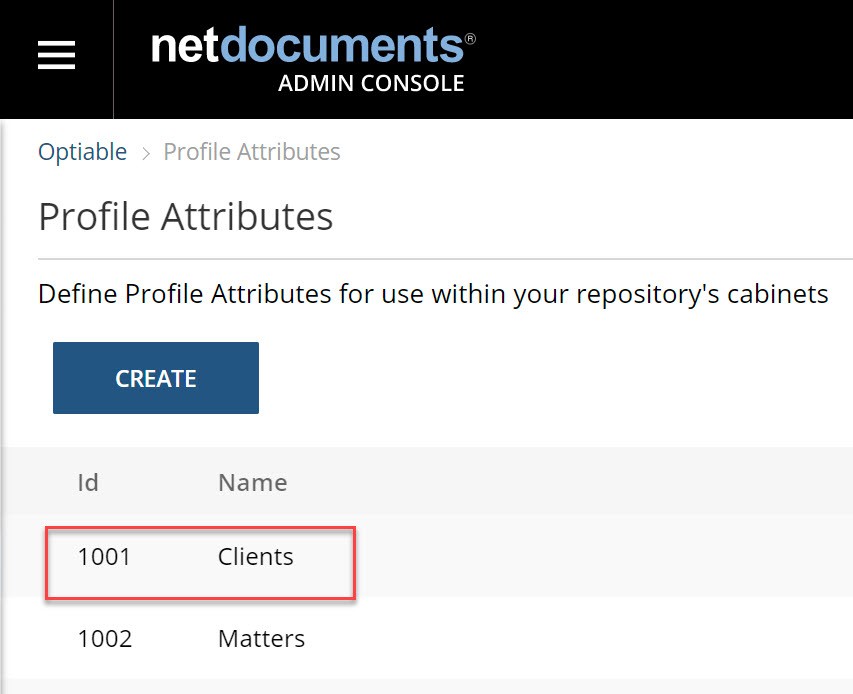
Step 3: Double-click on Client
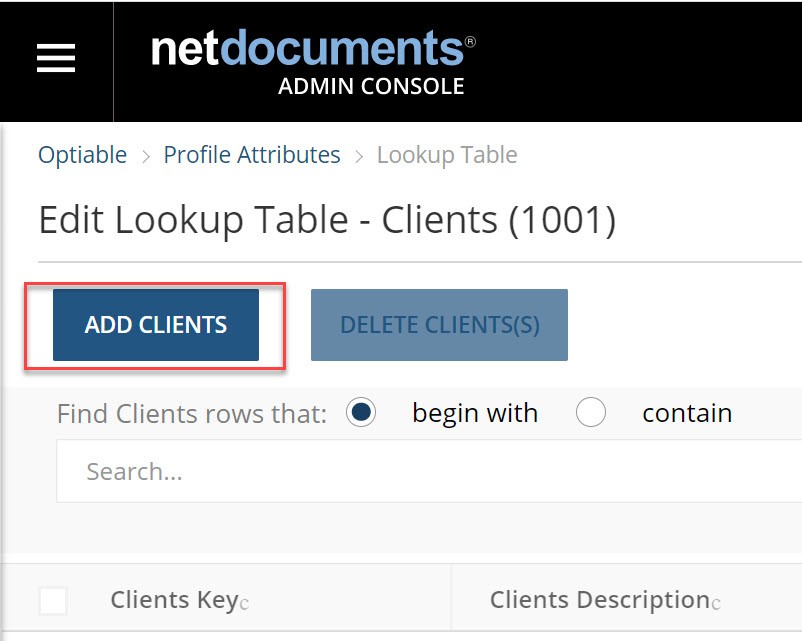
Step 4: Click Add Client
Step 5: Fill out the information below
Most of the time, you must fill out a Client Key and Description, and nothing else.

Step 6: Click Close

Adding a New Matter
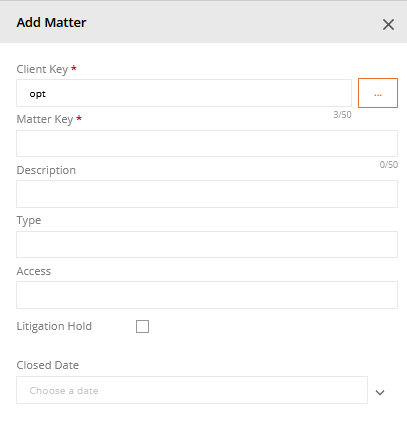
Adding a matter mirrors adding a client, except that you select the Client Key before entering the Matter Key and Description. This establishes the parent-child relationship between the client and its matters.
Step 1: Double-click on Matter
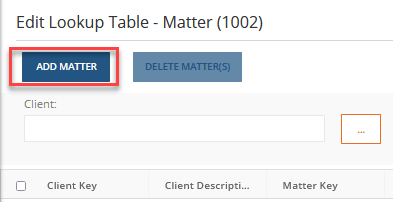
Step 2: Click Add Matter
Step 3: Enter the Matter Information
Enter the Matter Key and the Matter Description
Tip: The client and matter tables each have their own unique URL. If you add clients and matters frequently, bookmark both pages so you can jump straight to them instead of navigating through Admin → Profile Attributes every time.
That’s the full process for adding clients and matters in NetDocuments. Once your naming conventions and profile attributes are configured correctly, this becomes a fast, repeatable task for your administrators.
If your firm needs help configuring profile attributes, cleaning up client and matter data, or planning a NetDocuments implementation, schedule a consultation or get in touch with our team.